You will need to set up your software settings first as per your need. To do so, please follow the below steps.
Go to "Settings" from the left menu, and then click on "Settings".
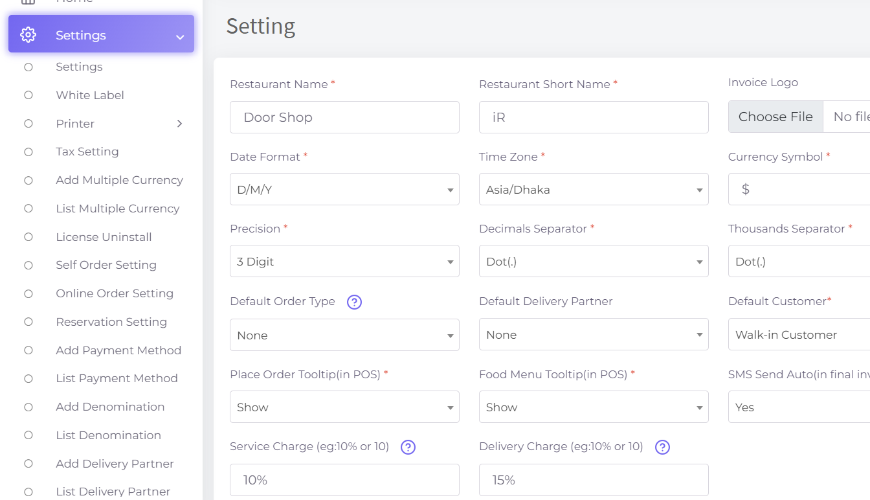
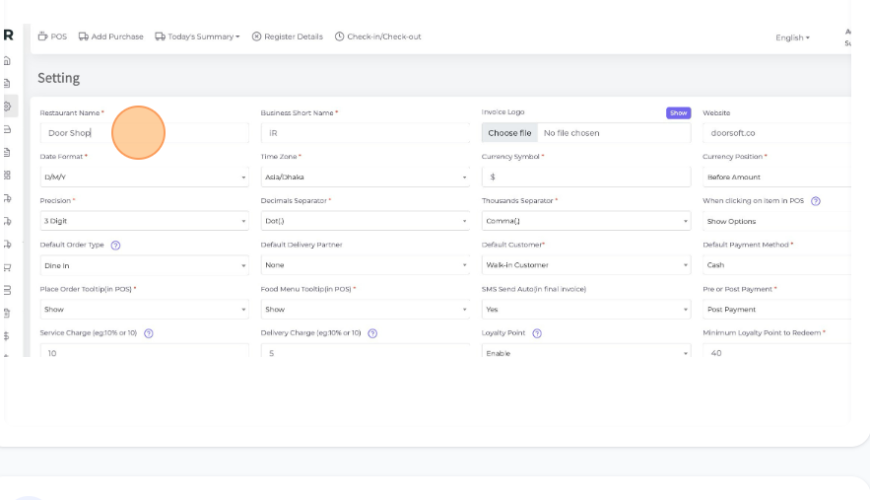
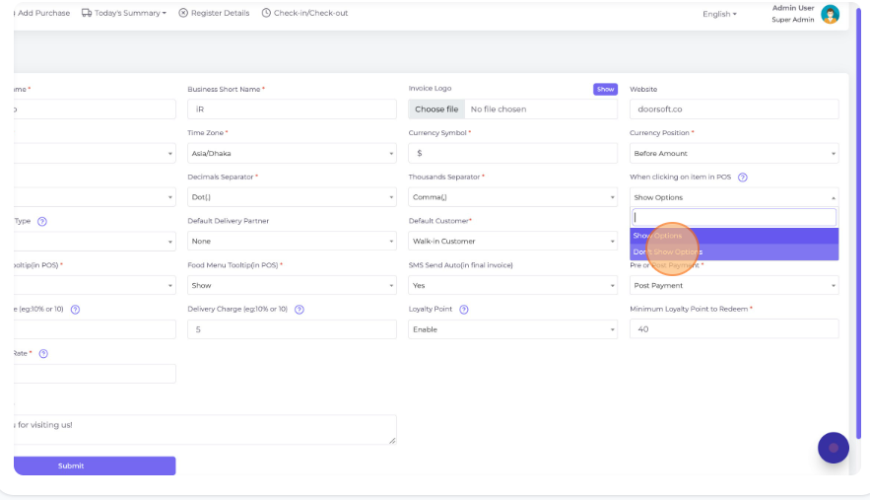
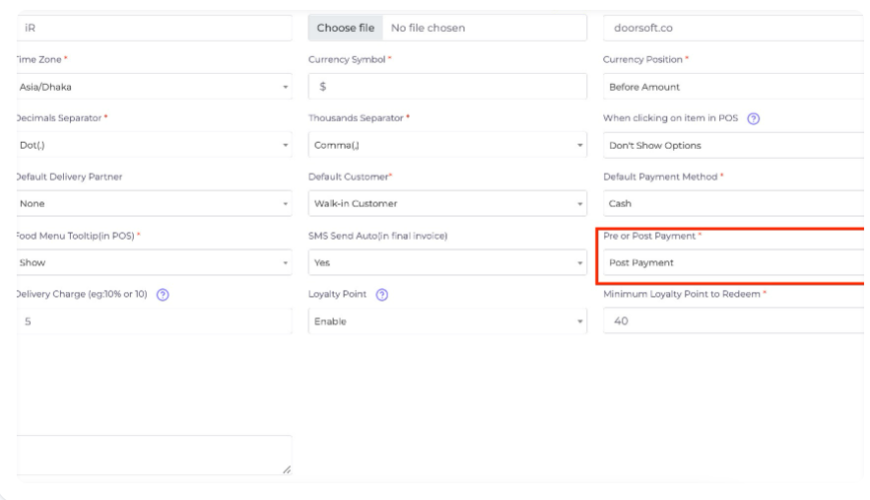
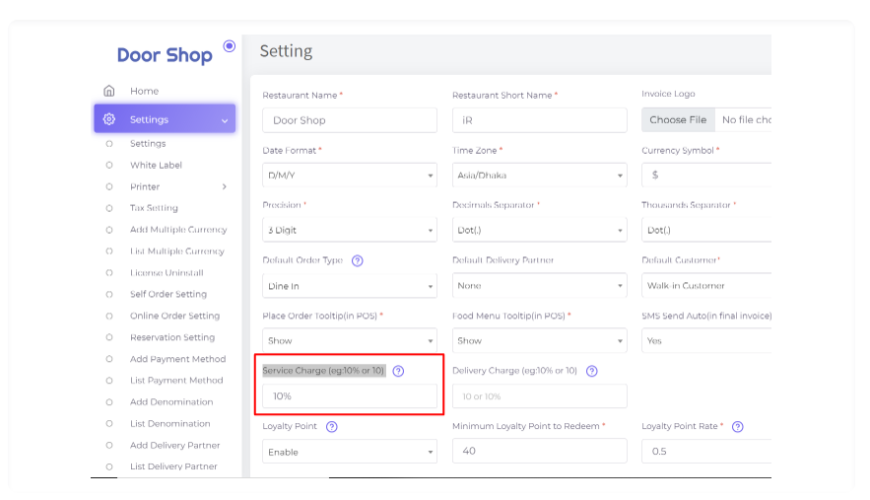
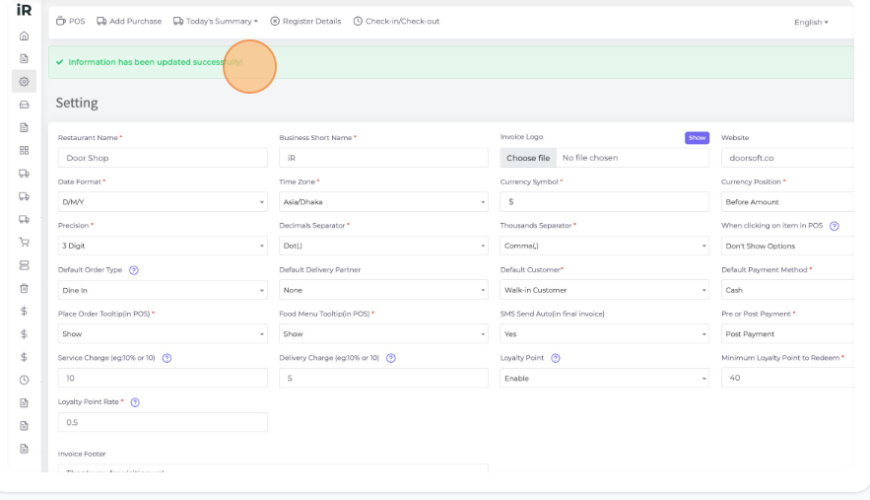
Please enter or select these options: Restaurant Name, Invoice Logo, Website link, Date Format, Time Zone, Currency Symbol, Currency Position, Precision, Decimal Separator, Thousands Separator, etc as per your need. Here "Business Short Name" is this https://prnt.sc/wrfdiG666Szh Please keep in mind that it should be only 2 letters.
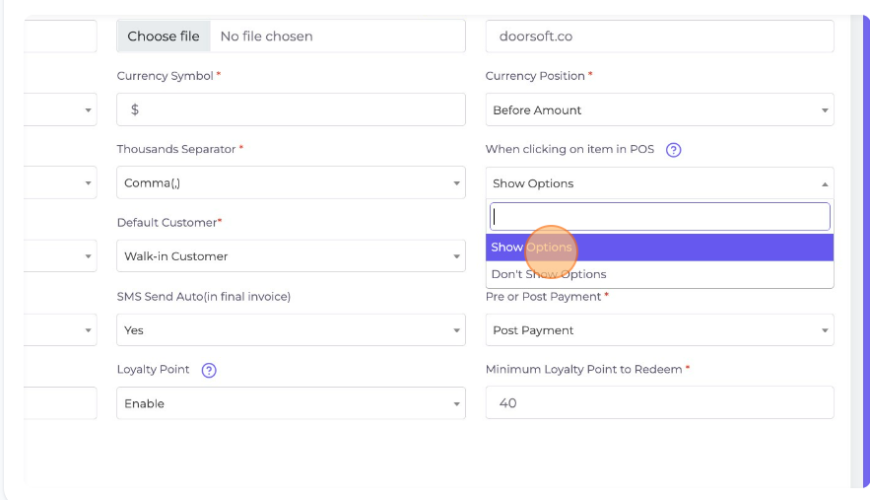
When clicking on an item in POS: In this field, if you click "Show Options" and
if the item exists in the cart in POS then the system will show a modal for show options, and if clicking "Don't Show Options" the system will increase the quantity for the same item in the cart in POS. Please check the next step for more detail
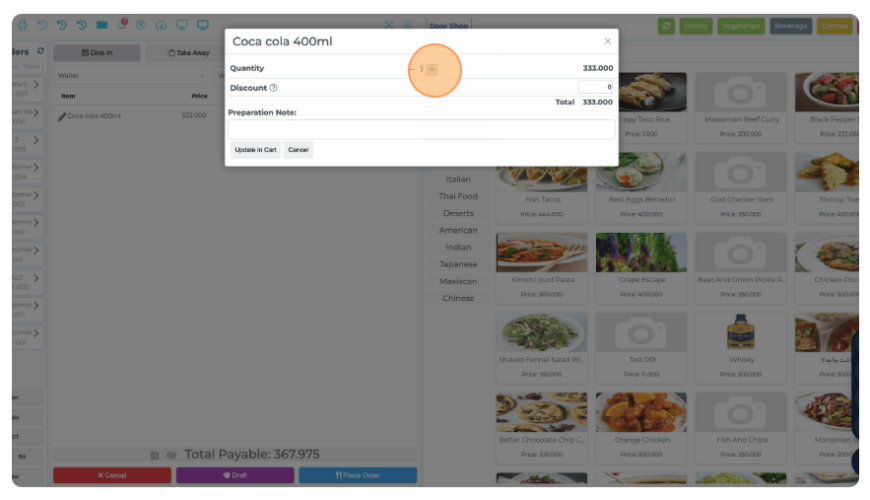
If you choose "Show Options" from "Settings" it will show a modal like this when adding any item to the cart. Here you can add any note or give a discount by using this field on this modal. Also, you can select applicable Modifiers too.
Also can increase or decrease item quantity by clicking the plus or minus (+/-) button.
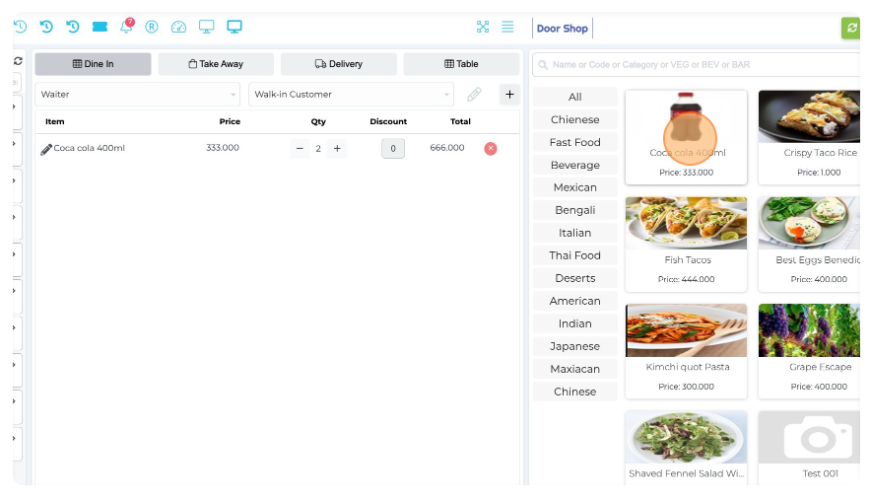
If you select "Don't Show Options" from the setting it will not show any options when clicking any item to add to the cart. If clicking multiple times item quantity will increase in the cart.
See below how it works in POS.
If you select "Don't show Option" in "Setting". When clicking any item on POS more than once and if the item already remains in the cart the system will increase the quantity there.
Default Order Type: Here you can see three types of orders, if you select any order type it will be selected by default in the POS screen always.
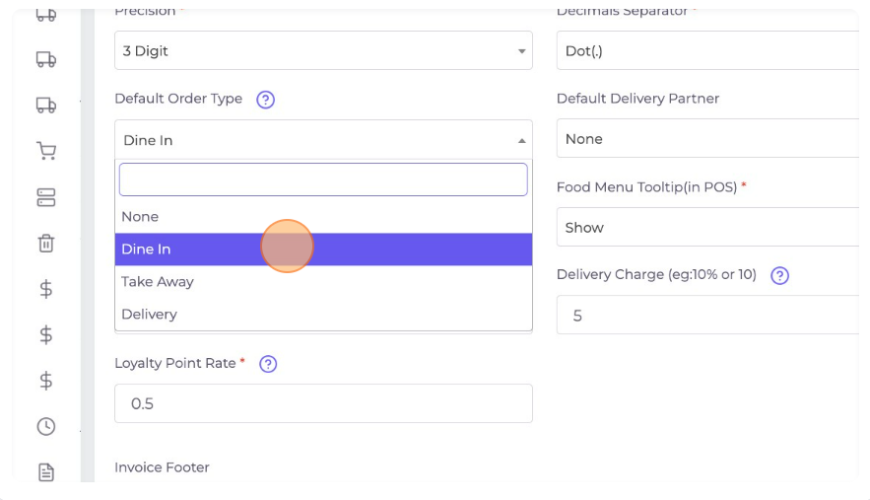
Default Delivery Partner: You can select default delivery partner here and system will consider the price for this delivery partner default, we will discuss later details

Default Customer: Here you can see your customers if you select any of them it will be selected by default in the POS screen always.
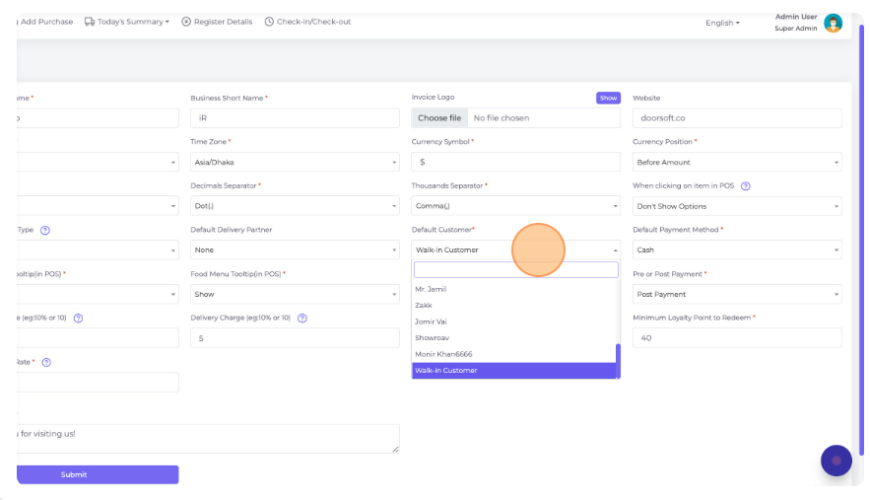
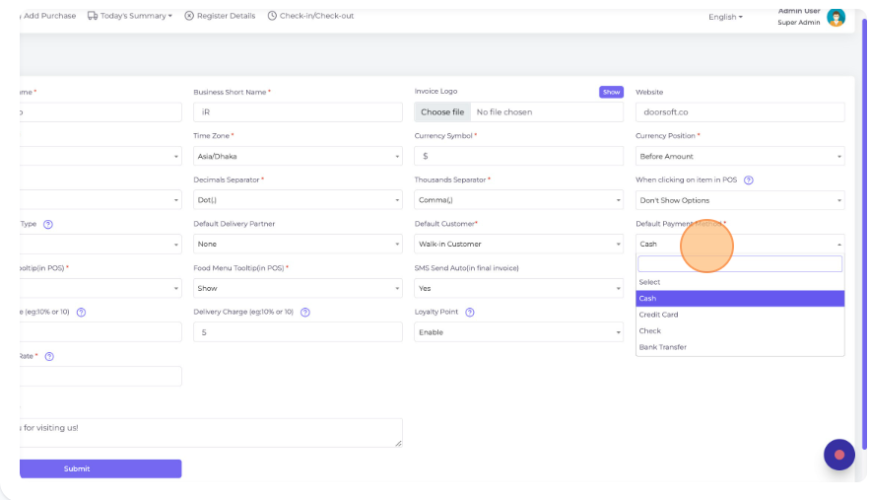
Default Payment Method: Here select any payment method which you want to choose as a default payment method in your finalize sale screen. The selected Payment Method will always be selected by default in the finalize sale screen.
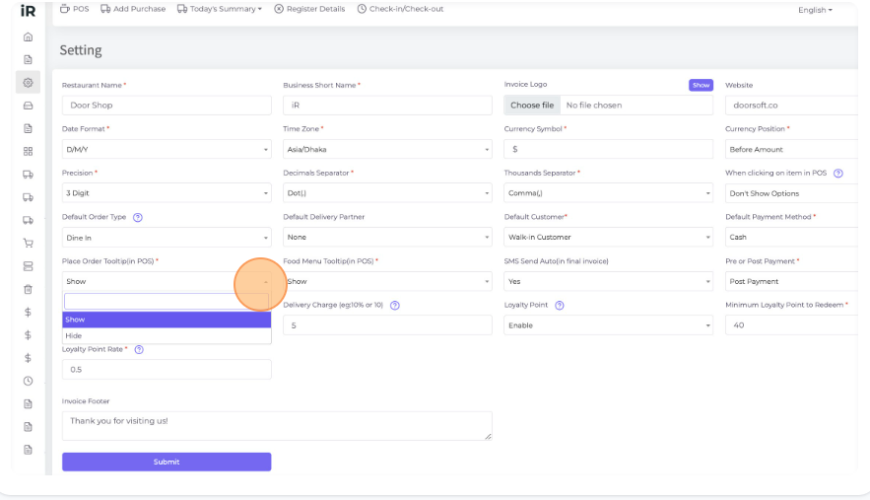
Place Order Tooltip(in POS): It's a Tooltip for the "Place Order" button in POS which is shown when hovering the mouse on the button. You can hide or show this tooltip by selecting it here.
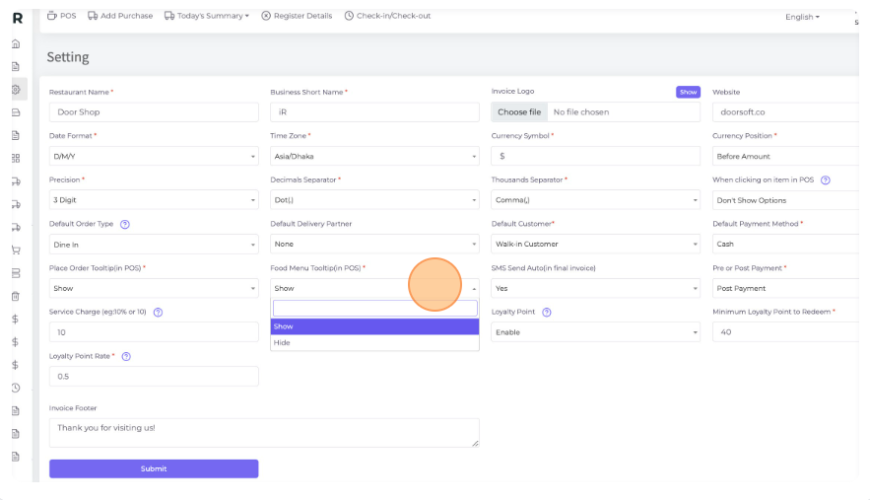
Food Menu Tooltip(in POS): It's a Tooltip for every food item in POS which is shown when hovering the mouse over any food item. You can hide or show this food menu tooltip by selecting here.
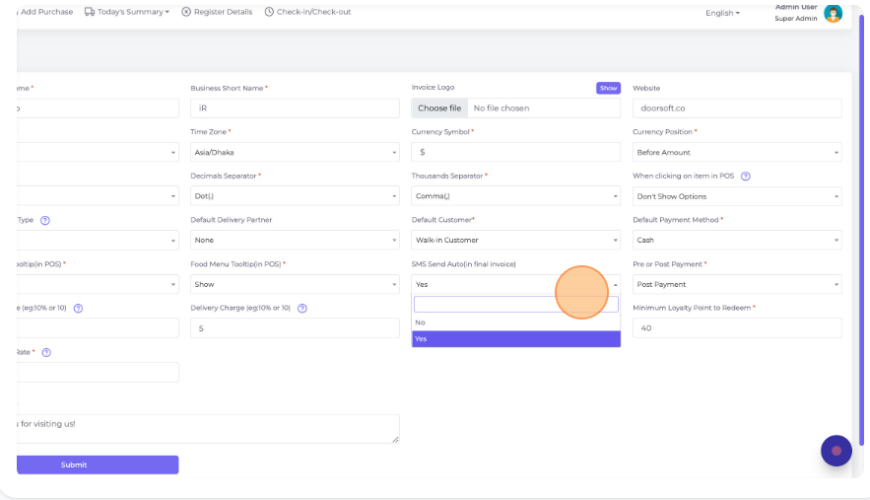
SMS Send Auto(in final invoice): In the Final invoice, it will send the invoice by SMS to the customer's phone automatically.
You can turn on or off this SMS system by clicking yes or no from this field.
Note that you must have configured SMS from the left menu before you enable this.
Service Charge (eg:10% or 10): Service charge will be effective on the POS screen. You can set your default service charge, the system automatically calculates this service charge on the POS screen for every Dine-in type invoice, if you don't want to set default then keep it blank.
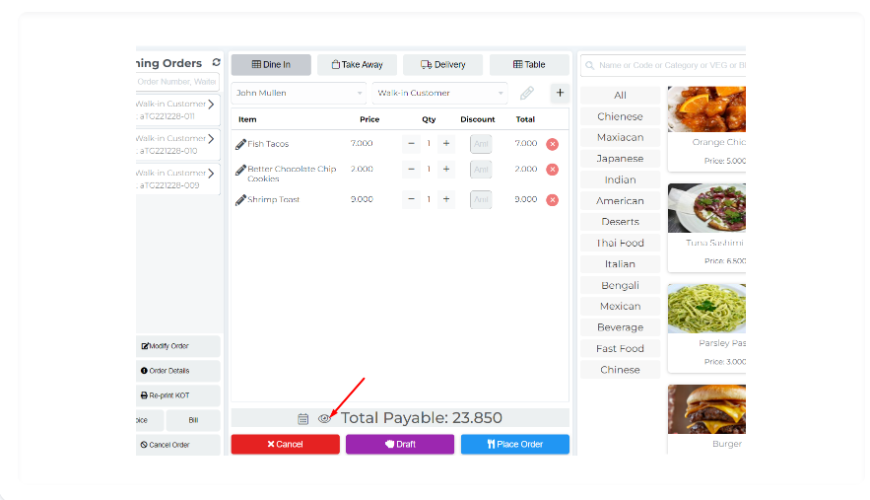
Here in the POS screen add some items to the cart then click on the icon for checking the applied charge.
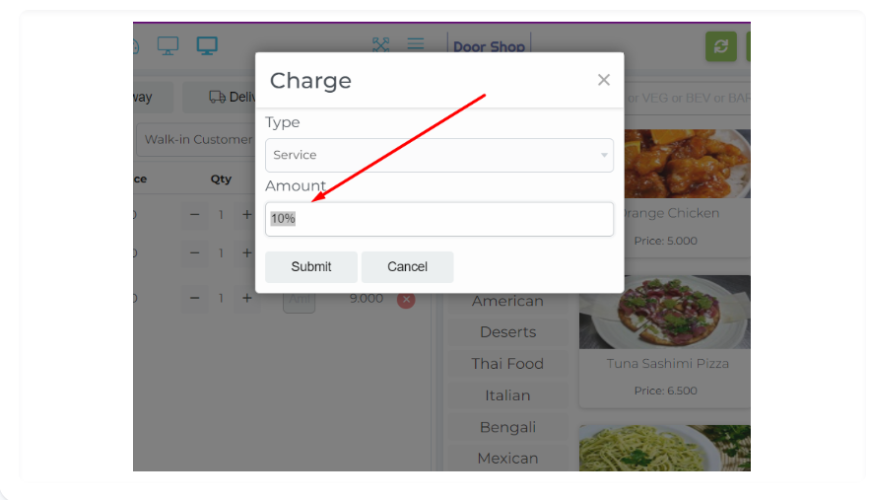
Here 1.800 charge was applied automatically from the setting 10% service charge, you may change this default amount. Click on the "Charge" button.
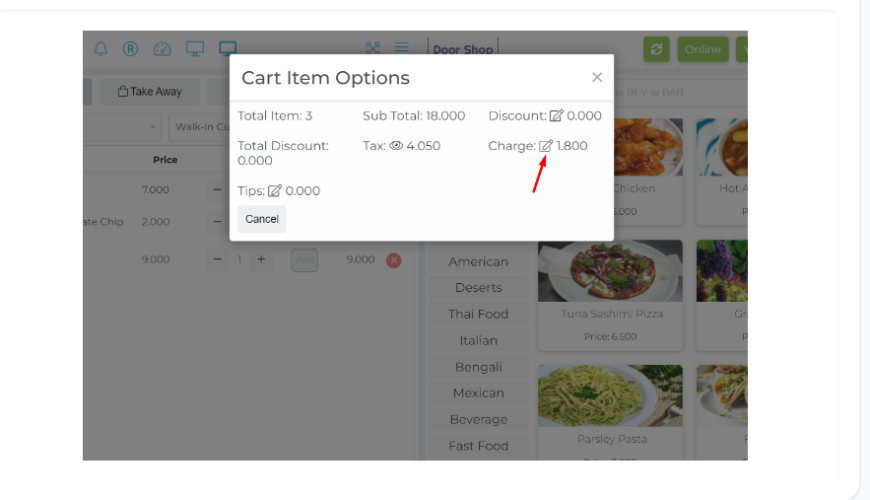
The system automatically applied the default 10% service charge here.
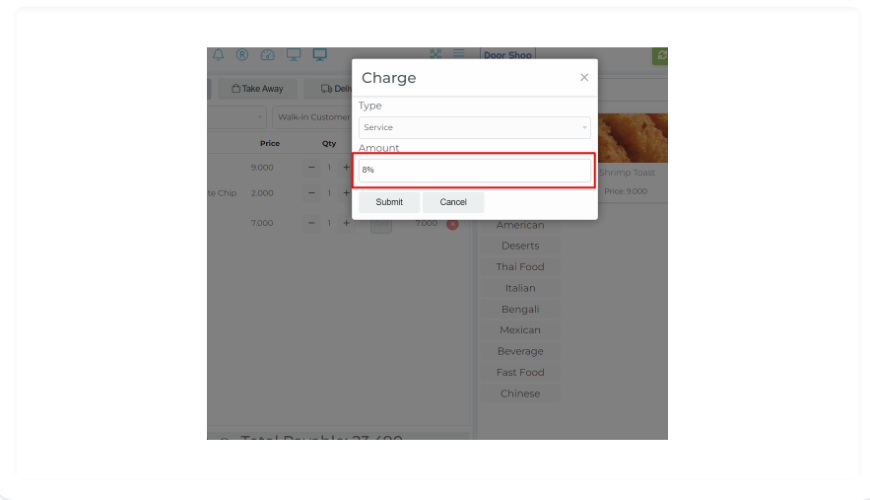
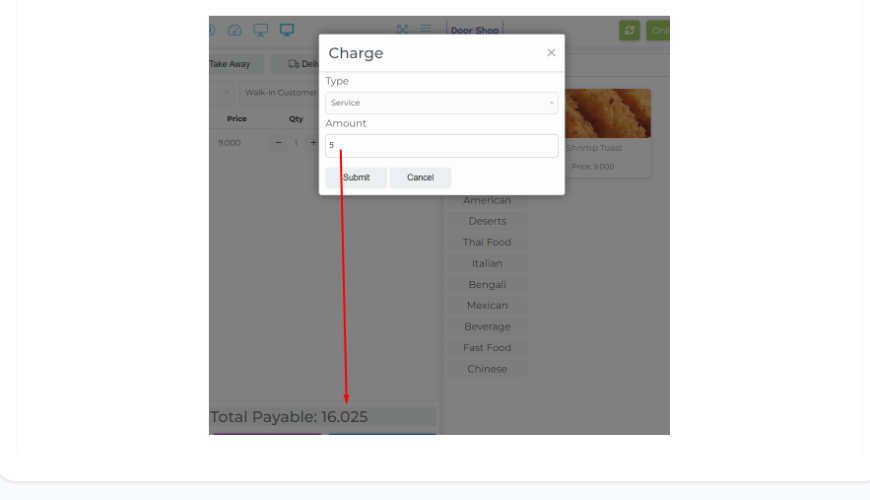
If you want you can change this default charge from here.
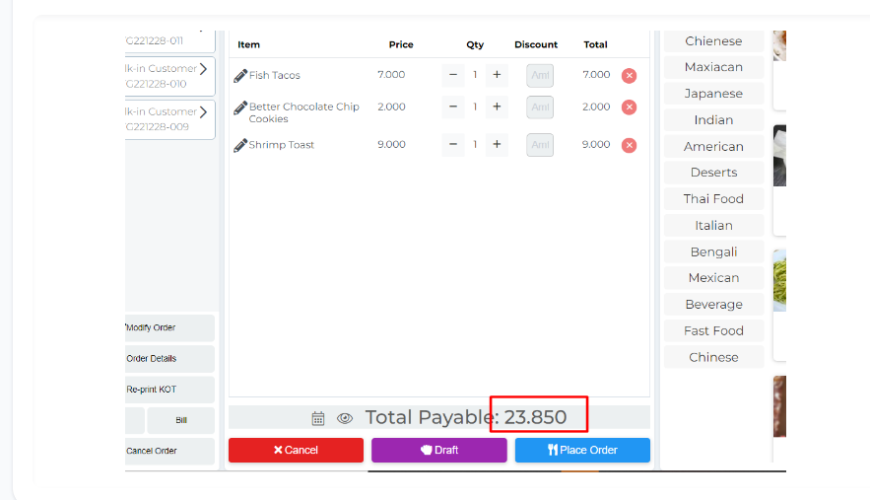
Here you can see the total payable price increased from the previous price because the charge is now included here.
Now place the order and sell it.
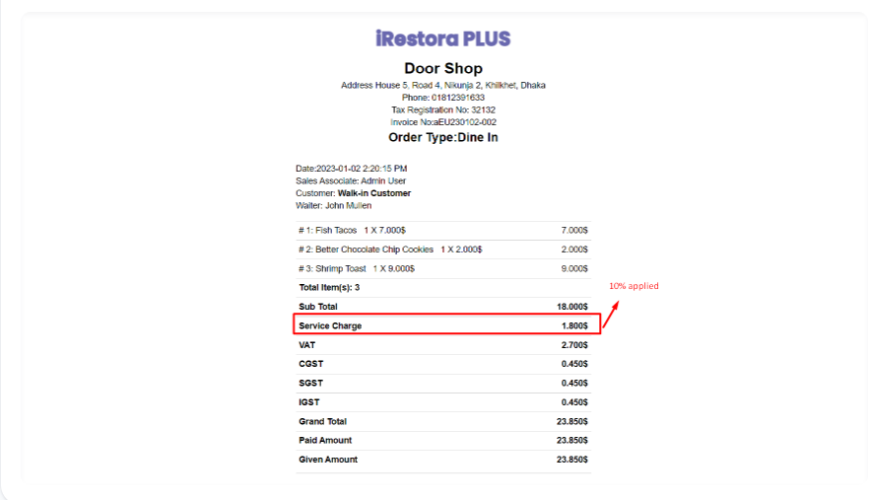
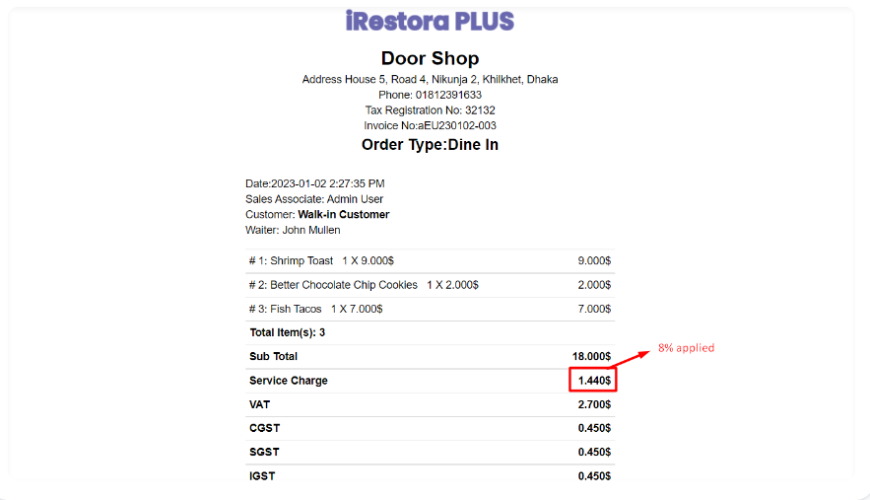
Here in the invoice you can see the "Service" charge added and showing in the invoice.
If you want you can change the default charge, let's see a screenshot.
Invoice.
Let's check with a flat amount. you can set a flat amount in the setting. we will check it directly here.
Invoice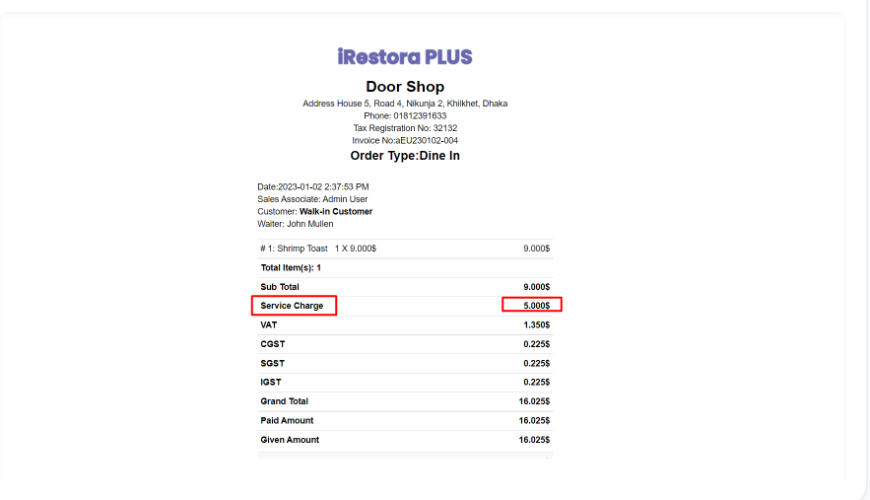
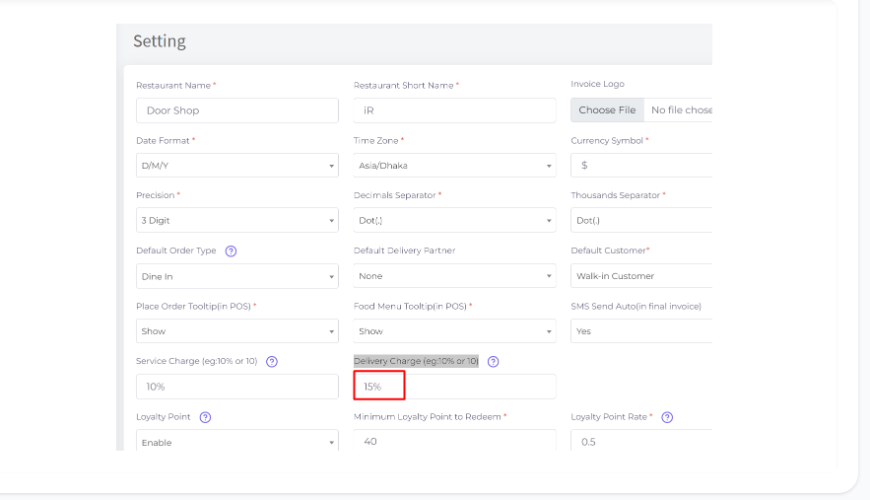
Delivery Charge (eg:10% or 10): In case you have a default delivery charge for Delivery type orders in percentage or flat amount then you can set that here and that will be reflected automatically in the POS.
Delivery charge will affect the POS screen, if you set your default delivery charge, the system automatically calculates this delivery charge on POS screen for every Delivery type invoice, if you don't want to set default then keep it blank.
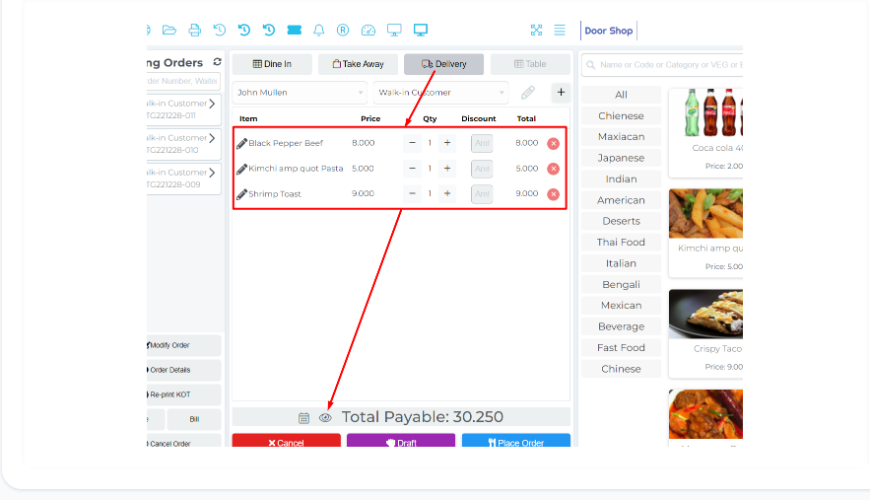
Here in the POS screen add some items to the cart then click on the icon for checking the applied charge.
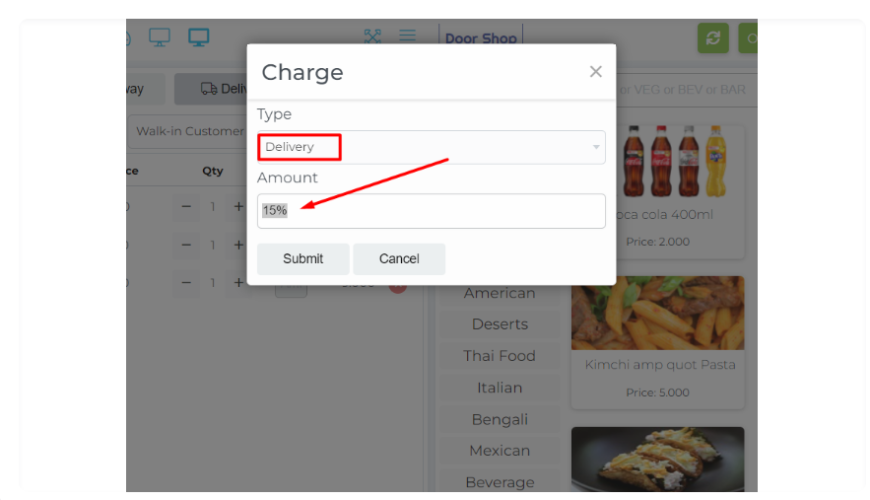
Here the 3.300 charge was applied automatically from the setting 15% delivery charge, you may change this default amount. Click on the "Charge" button.

The system automatically applied the default 15% delivery charge here.
If you want you can change this default charge from here.
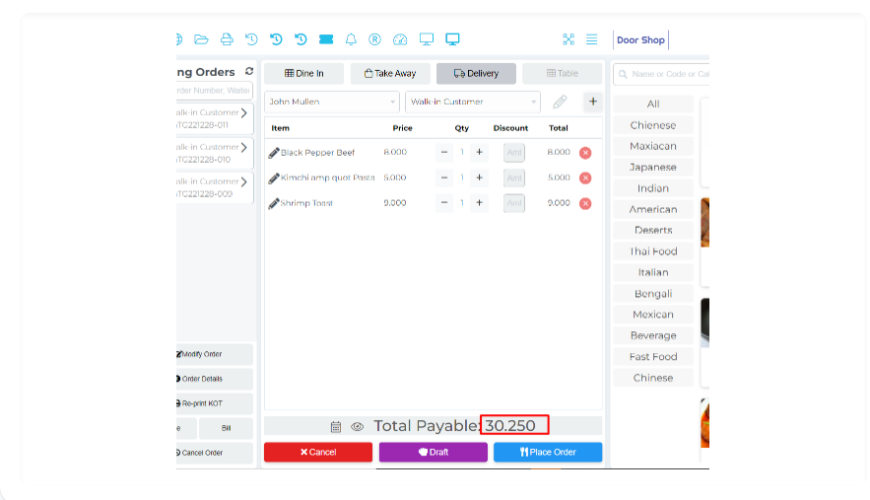
Here you can see the total payable price increased from the previous price because the charge is now included here.
Note: You must select a customer that has at least one delivery address, without a delivery address you will not be able to place an order for delivery type order.
Now place the order and sell it.
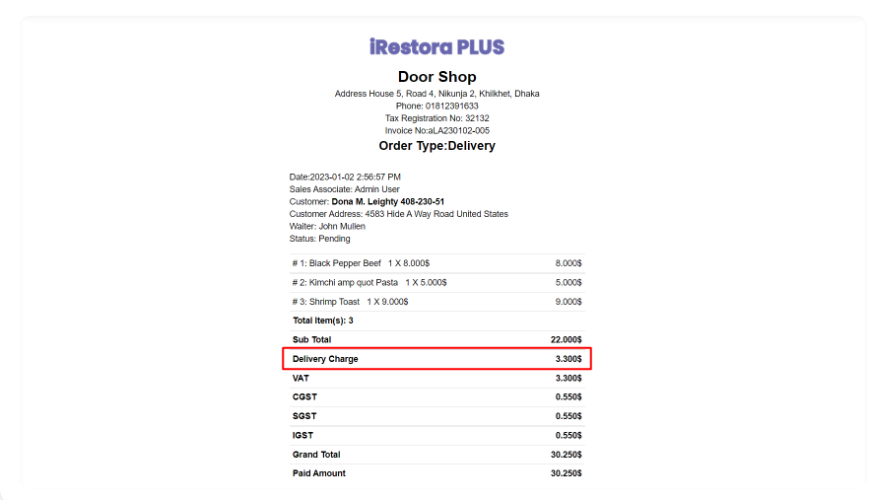
Here in the invoice you can see the "Delivery" charge added and showing in the invoice.
If you want you can change the default charge, let's see a screenshot.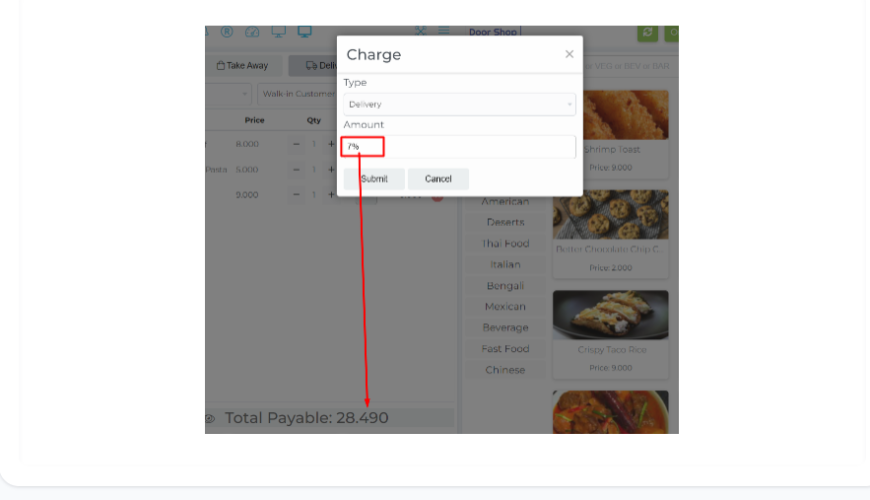
Invoice.

Let's check with a flat amount. you can set a flat amount in the setting. we will check it directly here.
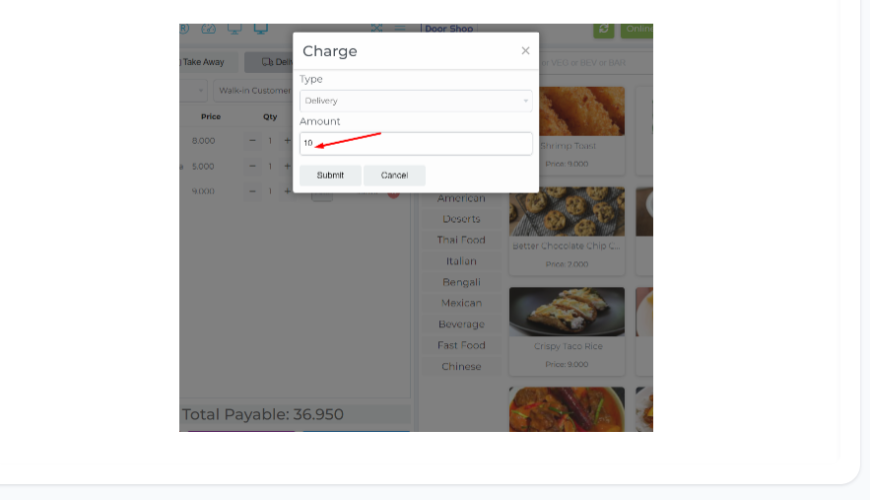
Invoice

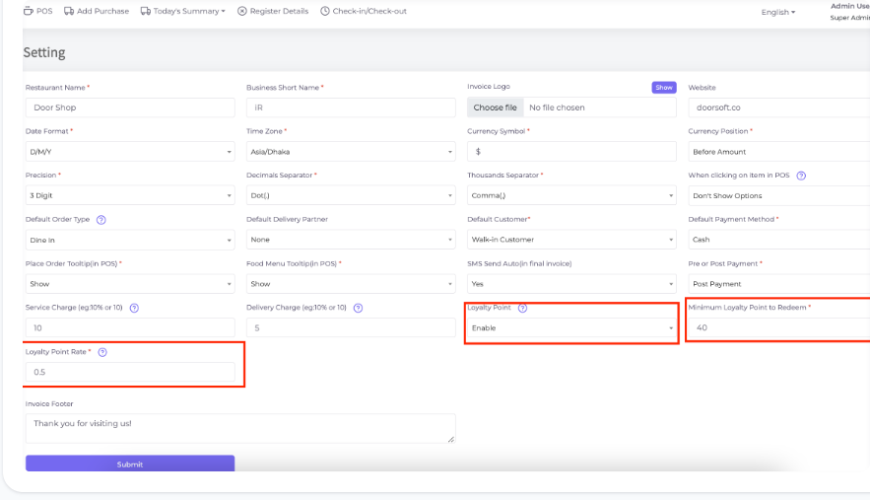
Invoice Footer: The footer will be printed with every invoice. You can enter your "Invoice Footer" as per your need. Eg: Thank you for visiting us!
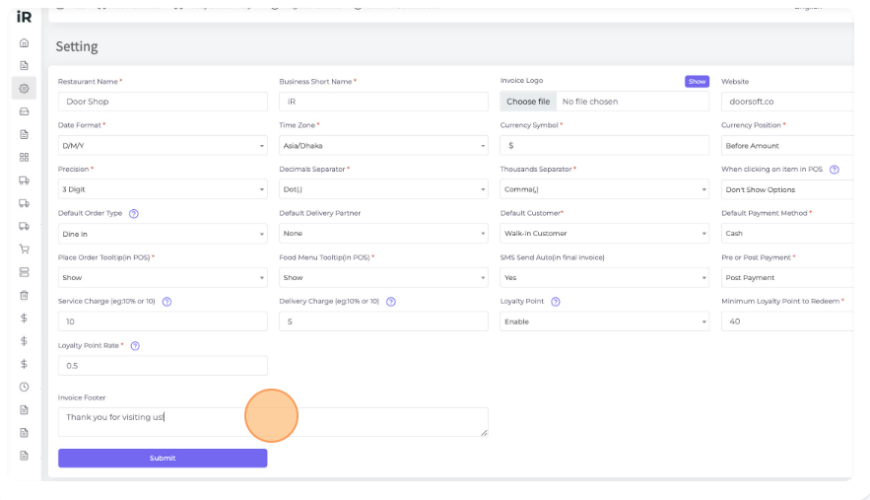
Click on the "Submit" button to update the changes.

After successfully updating the changes it will show a message like this.
Was this page helpful?
Thank you for your feedback!
Please Login First


Sign in to post your comment or signup if you dont have any account.
.png)
0 Comments