“If your script is running on localhost using xampp/wamp or any other’s server then you can skip this step”
Install Xampp: XAMPP is a web server solution, we need to install xampp due to run print server script.
Download xampp from this link as per your operating system https://www.apachefriends.org/download.html
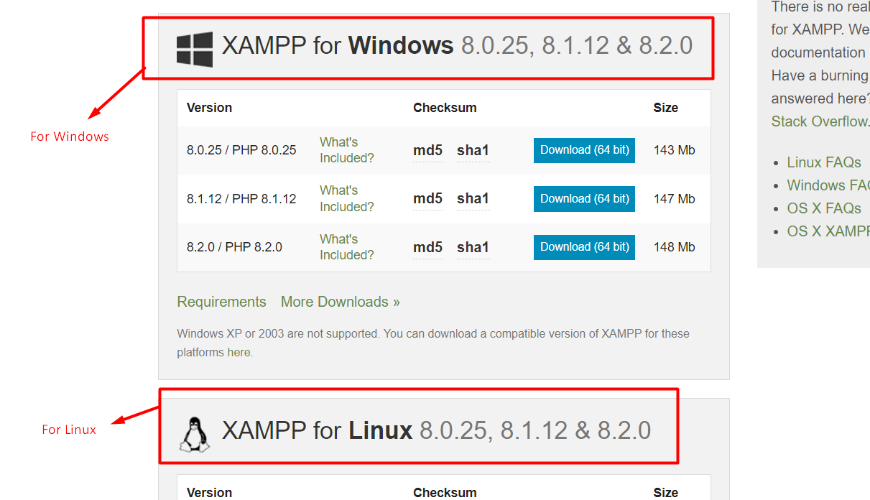
After download- install the xampp in any drive except C: (for safety), you may install it in D:, E: etc.
You may check this link for how to install xampp (before checking the link- you need to watch this video beginning at 9:15s) - How to install xampp?
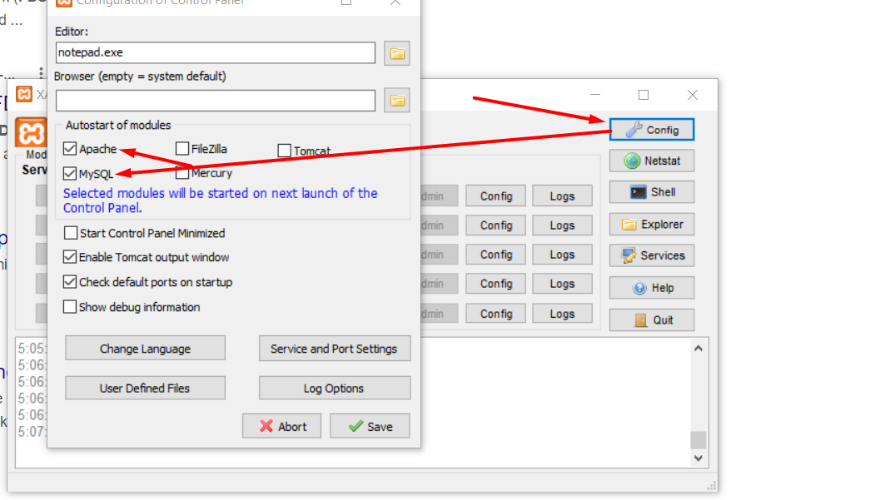
Now click on the Config button and then click Apache (httpd.conf) for some changes.

Search denied and replace with granted, you may get 3 or 4 denied in this file so replace all with granted.

After changes look like

Finally save this file.
Now click on the Config button and then click PHP (php.ini) for some changes.
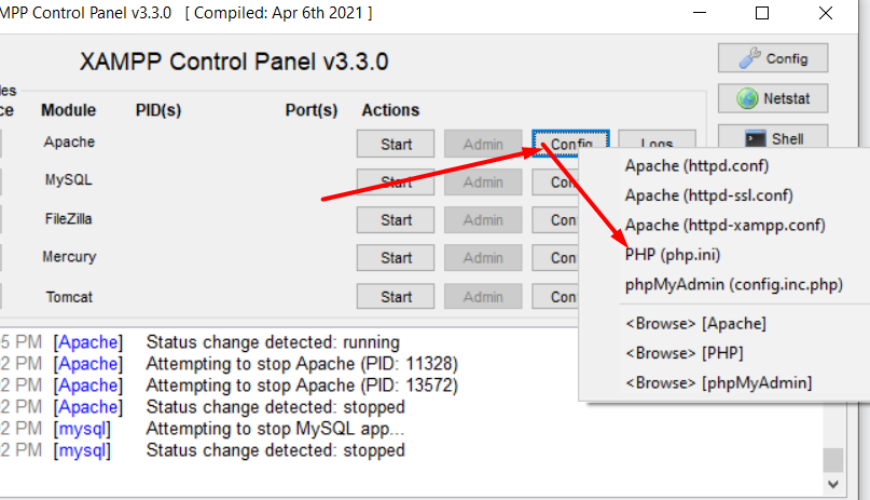
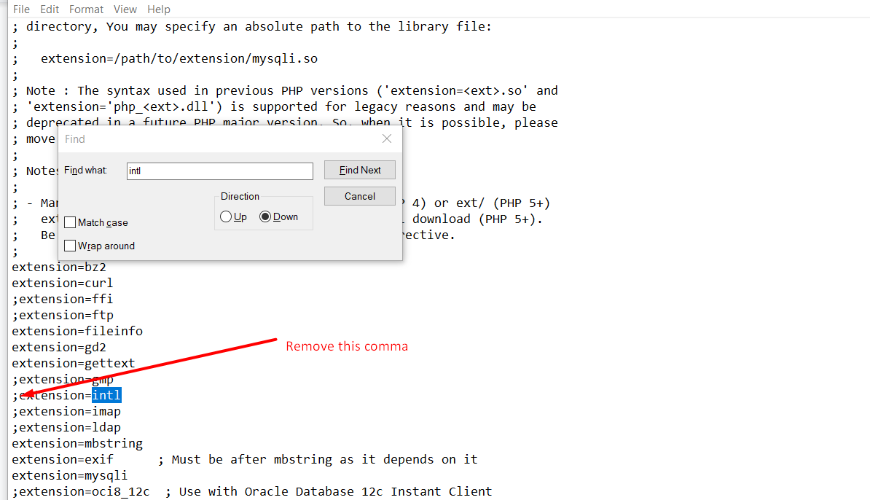
We need to enable the intl extension from here, so search intl and remove the comma sign from first of this line to save this file.
After changes look like
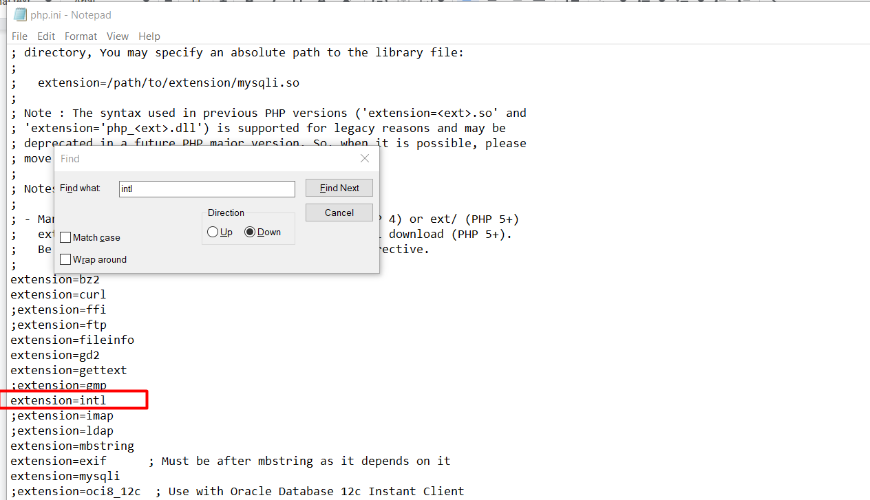
System will auto start after opening the xampp server if you set this setting otherwise you need to start manually.
Now close the window.

And open again.
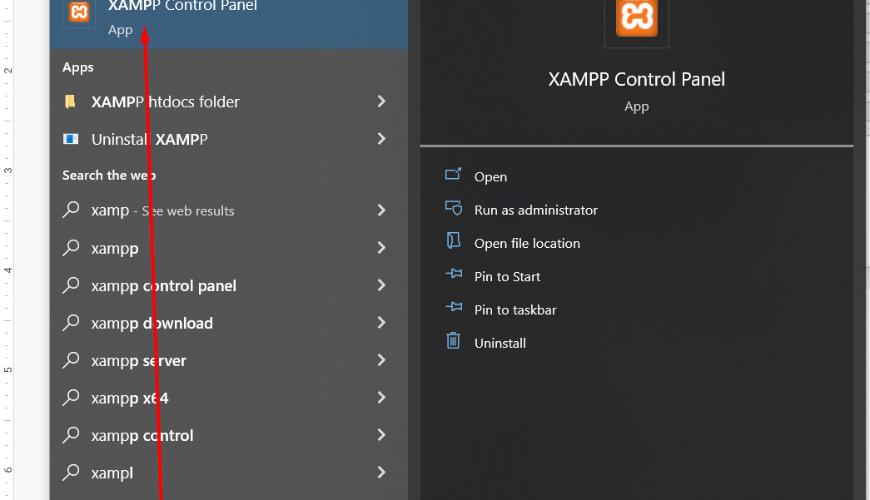
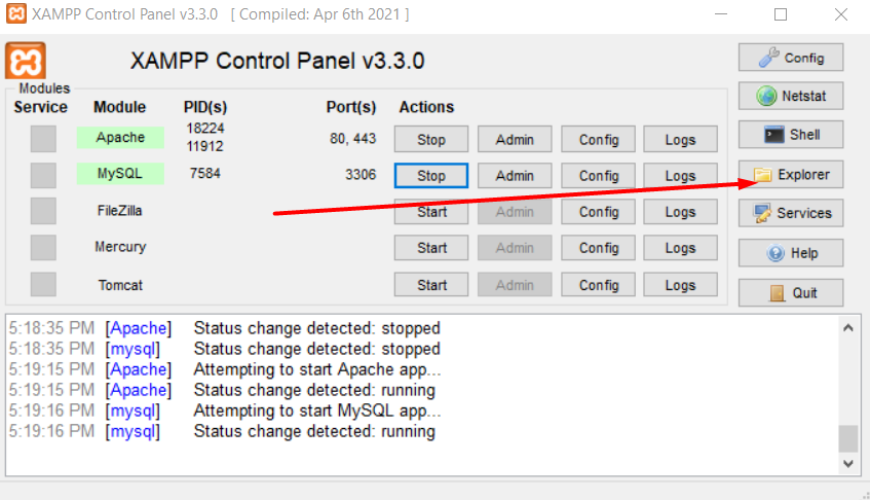
Now the Apache and MySQL Server will start automatically because of the previous setting that we did.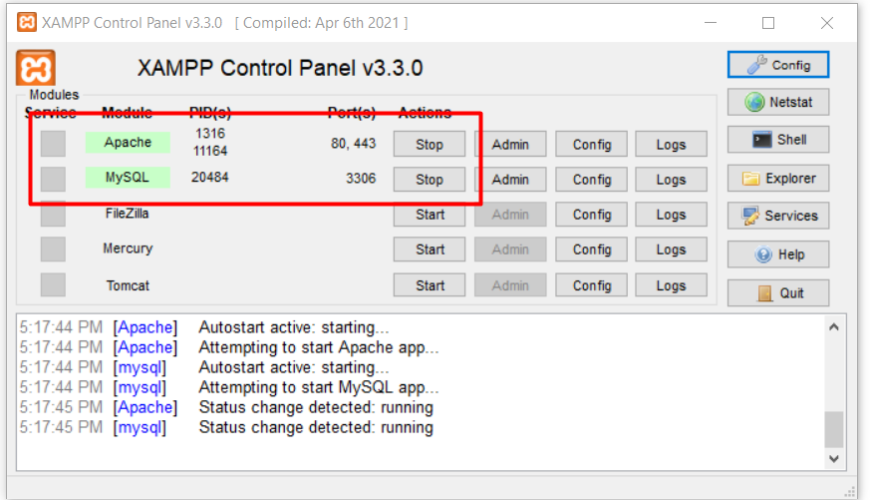
If your system does not open automatically then click on this button to start both.
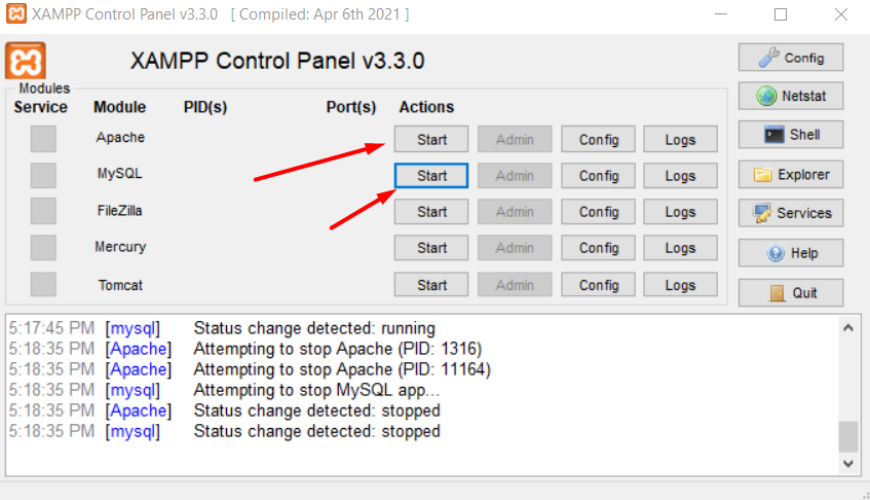
Now we will run the print server script so click on the Explorer
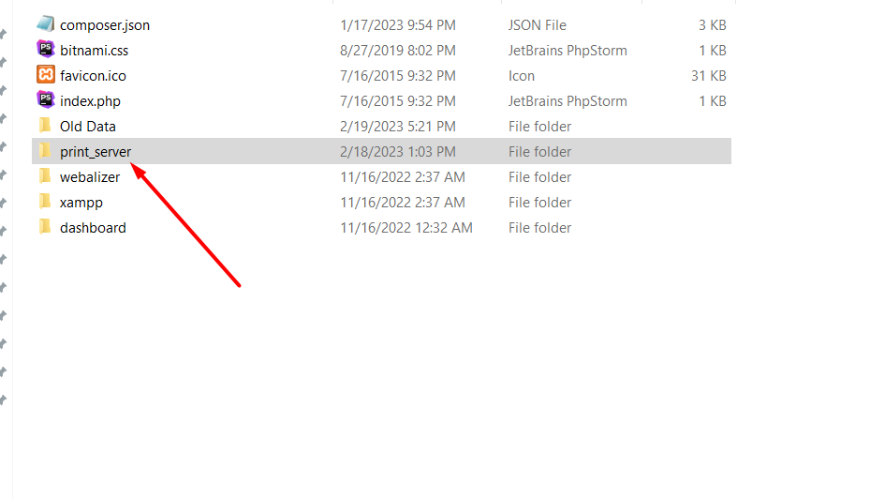
Put the print server script in the following path: xampp/htdocs/
You will get the script of our project root path just copy and paste here.
Now we will check the test print.
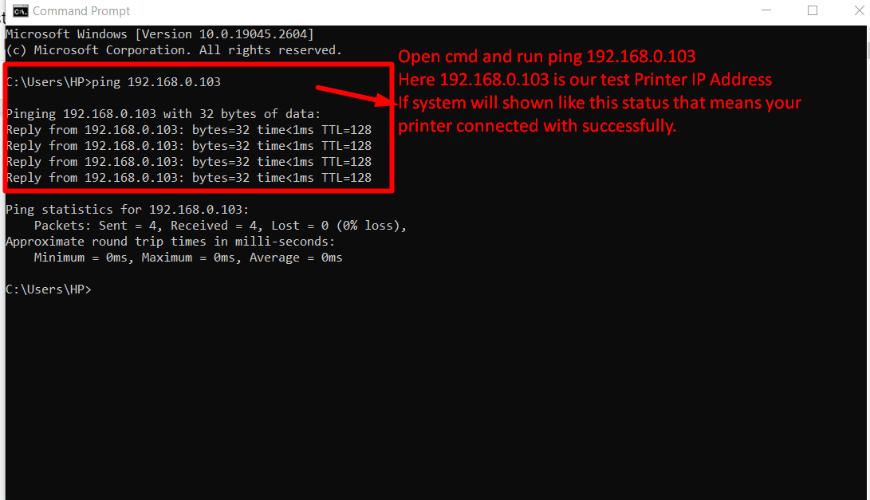
Note: You must make sure your printer is successfully connected otherwise the system will not work.
If your Network Printer is connected with ethernet then you may check connection status.
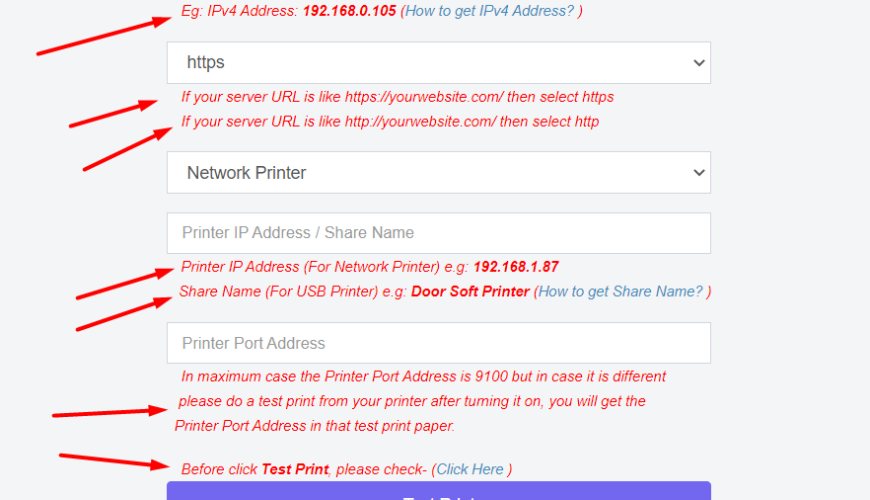
Open your browser and hit this URL: http://localhost/print_server/ and it will looks like below
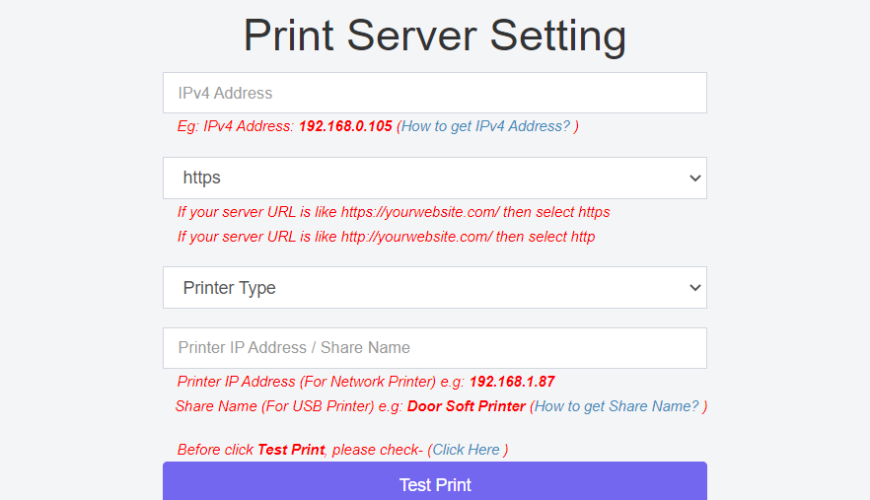
- Enter IPv4 address.
- Select https or http as per your server installation URL.
- Select Printer Type, in case your printer is network type then you need to select Network Printer or USB printer.
- If your printer is Network Printer then you need to add Printer IP address, how to get the Printer IP Address- First make sure your printer successfully connected with Network then print a test print paper from your printer as per your printer model and then you will get Printer IP address and Printer Port Address.
In maximum case the Printer Port Address is 9100 but in case it is different please do a test print from your printer after turning it on, you will get the Printer Port Address in that test print paper.
- If your printer is USB then you need to put Share Name
Note: Please follow all instructions carefully in this form.
Please do a Test Print. If everything is ok, you will get a test print out otherwise check all of the steps again.
Was this page helpful?
Thank you for your feedback!
Please Login First


Sign in to post your comment or signup if you dont have any account.
.png)
0 Comments